Acupanel® Hydro White Waterproof Wall Panels
Waterproof White slat wall panels for bathrooms, kitchens and wet rooms.
You need 0 panels to cover 0 m² (incl. 10% waste)
 Trade pricing available. Join now
Order samples
Select the finishes you'd like to try


Specifications
- Slat Width
- 17.6mm
- Panel Thickness
- 12mm
- Panel Width
- 300mm single / 590mm pack of 2
- Panel Length
- 2400mm or 3000mm
- Material
- PVC clear coat on polystyrene
- Waterproof
- Yes
- Anti-Microbial
- Yes
- Fire Rating
- Not rated
- Acoustic Rating
- Not rated
How to install
-
1
Prepare the Surface
Make sure the wall is clean, dry, flat and structurally sound. Plasterboard, tile backer, existing tile, brick and concrete all work. Remove dust, grease and any loose material, and sand glossy surfaces lightly so the adhesive can bond cleanly.
-
2
Measure and Cut
Measure the wall height and plan your layout across the run. Use a fine-tooth saw, jigsaw or multi-tool to trim panels to size and to cut around taps, shower fixtures or any wall penetrations. Dry-fit the first row before committing.
-
3
Apply the Adhesive
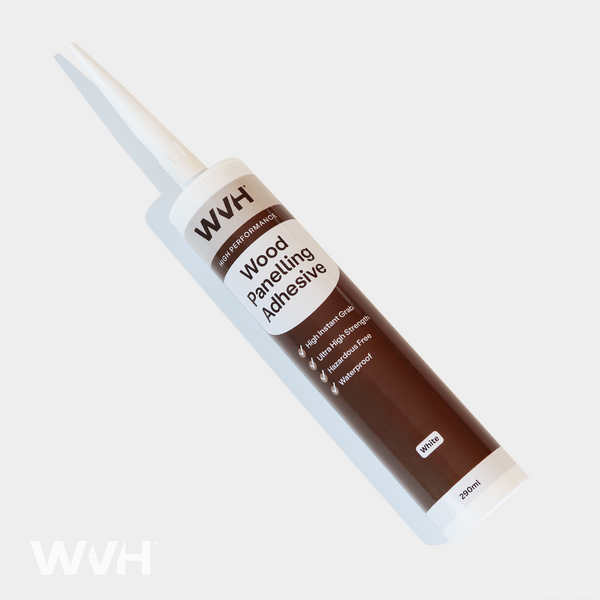
Using a standard caulking gun, apply WVH® Waterproof Adhesive and Sealant across the back of the panel in continuous vertical beads. The same product bonds the panel and waterproofs the joints, so no separate sealant is needed.
-
4
Fit the Panels
Press the first panel firmly onto the substrate and check for plumb. Slot each following panel into the tongue of the previous one for a seamless join. Work along the wall without screws or visible fixings.
-
5
Seal the Joints and Edges
Run a continuous bead of WVH® Waterproof Adhesive and Sealant along every tongue and groove joint, around any cut edges, and at the perimeter where the panels meet the shower tray, tiles or wall returns. Smooth each bead with a damp finger for a clean line.
-
6
Final Checks
Wipe any excess sealant from the surface while it is still fresh. Let the installation cure according to the sealant instructions before exposing it to direct water. Once cured, the wall is ready for everyday bathroom use.
Description
Key Features Fully Waterproof — Purpose-built for wet environments including showers, bathrooms, and splash zones
PS Core with Clear Coat PVC Layer — Durable polystyrene slat construction finished with a clear PVC coat for effortless cleaning and long-lasting protection
Iconic Slat Design — The same timeless vertical slat aesthetic, now built to handle direct water contact
Smooth, Grain-Free Finish — A clean, contemporary surface with no wood grain print — ideal for minimal and monochrome schemes
Super Lightweight — Easy to handle and manoeuvre, even in tight bathroom spaces
Tongue & Groove Installation — Quick, clean, and secure fitting with no specialist tools required
Easy to Clean — Simply wipe down — no sealing, oiling, or special maintenance needed
Available in Four Colours — Oak, Walnut, Grey Oak, and White to suit any interior palette
Overview Say hello to the Acupanel® Hydro in white — our iconic slat wall panel, reimagined for the spaces where style meets steam.
Bathrooms, shower enclosures, wet rooms, kitchen splashbacks — these are the rooms that deserve beautiful panelling just as much as any other in your home, but until now, traditional wood slat panels simply weren't up to the job. The Acupanel® Hydro range changes that. Built around the same slat profile that has made our panels one of the most sought-after wall finishes in interior design, the Hydro takes that formula and makes it water-ready.
Each panel features a polystyrene (PS) core wrapped in a clear coat PVC layer, creating a surface that shrugs off splashes, steam, and humidity without breaking a sweat. That PVC coating also makes cleaning genuinely effortless — a quick wipe is all it takes to keep your panels looking as fresh as the day they went up.
Despite their robust construction, Hydro panels are remarkably lightweight, making them easy to carry, cut, and position — even when working in the confines of a shower enclosure. Installation is handled via a tongue and groove system — panels click neatly together for a seamless, professional finish. For the cleanest look, panels should be fixed using a grab adhesive only; avoid screws, which would detract from the seamless finish. Sealant should be applied along the tongue and groove edge to close the small gap between panels, preventing water and moisture from getting behind the installation.
The white colour takes a smooth, grain-free approach — a clean, contemporary finish that works brilliantly in minimalist and monochrome bathroom schemes.
To complete the installation properly, we also offer a dedicated WVH® Waterproof Adhesive and Sealant, an all-in-one solution designed specifically to work alongside these panels. Available in black and white.
What's In The Box? 2 x Acupanel® Hydro Waterproof Panels in the White finish Specification This product is sold in packs of two panels. Please note the dimensions below are for a single panel.
240cm x 30cm (Single Panel)
2400mm (H)
300mm (W)
12mm (D)
Sqm per panel: 0.72
Sqm per pack: 1.42
300cm x 30cm (Single Panel)
3000mm (H)
300mm (W)
12mm (D)
Sqm per panel: 0.90
Sqm per pack: 1.77
Due to the tongue and groove nature of these panels, when you join them together, the width is reduced by 10mm. Please allow for this reduction when ordering your panels, especially for large scale project. If you need any assistance calculating the quantity of the panels, please contact our sales team.
Installation & Downloads Installing these panels is simple with the tongue and groove edge, which helps create a seamless finish on your walls. The panels can easily be cut down to size and around fixtures and fittings as required. When installing these panels, you will need to apply a sealant along the panel joins as well as the top and bottom of the panels for a watertight finish.
We recommend using our WVH® Waterproof Adhesive and Sealant, an all-in-one solution that is designed for use near water and high-humidity areas. For further installation guidance, please refer to our technical sheet.
Technical Sheet Delivery The Acupanel® Hydro range is fully stocked in our UK warehouse, with free delivery available.
Delivery and returns
Delivery options and timing vary by product. View the methods available at checkout.
30-day returns on all orders
Items must be unopened and in original packaging
Contact us to arrange a return
Notify me


What sets it apart


Slat wall panels, engineered for water.
The iconic slat aesthetic, ready for water, steam and daily humidity. A smooth, clean white face runs across every panel, sealed under a clear PVC coat on a solid polystyrene core. The panel holds its shape and finish where finished timber would need ongoing sealing, oiling or replacement.
Installation is a single-product job. Tongue and groove slats slot together for a clean, continuous run, bonded and sealed with WVH® Waterproof Adhesive and Sealant. The result: a bright, architectural slat wall for shower enclosures, kitchens, wet rooms, splashbacks and utility spaces, with none of the timber upkeep.
How it works
Prepare the Surface
Make sure the wall is clean, dry, flat and structurally sound. Plasterboard, tile backer, existing tile, brick and concrete all work. Remove dust, grease and any loose material, and sand glossy surfaces lightly so the adhesive can bond cleanly.
Measure and Cut
Measure the wall height and plan your layout across the run. Use a fine-tooth saw, jigsaw or multi-tool to trim panels to size and to cut around taps, shower fixtures or any wall penetrations. Dry-fit the first row before committing.
Apply the Adhesive
Using a standard caulking gun, apply WVH® Waterproof Adhesive and Sealant across the back of the panel in continuous vertical beads. The same product bonds the panel and waterproofs the joints, so no separate sealant is needed.
Fit the Panels
Press the first panel firmly onto the substrate and check for plumb. Slot each following panel into the tongue of the previous one for a seamless join. Work along the wall without screws or visible fixings.
Seal the Joints and Edges
Run a continuous bead of WVH® Waterproof Adhesive and Sealant along every tongue and groove joint, around any cut edges, and at the perimeter where the panels meet the shower tray, tiles or wall returns. Smooth each bead with a damp finger for a clean line.
Final Checks
Wipe any excess sealant from the surface while it is still fresh. Let the installation cure according to the sealant instructions before exposing it to direct water. Once cured, the wall is ready for everyday bathroom use.
Reviews
Frequently asked questions

Trade pricing for professionals
Dedicated pricing, priority samples and a named account manager. Apply in 30 seconds.
Request your trade account
Fill in the form or call our trade team on 01525 851166. Most accounts are approved within one working day.

Why WVH®
Founded on craft.
Built for modern design.
Decades of experience supplying surface materials to the high-end automotive and marine industry. The same obsession with grain, finish, and consistency now defines every WVH® panel.
50+ years of expertise
Three generations of surface materials knowledge behind every product
Trusted by 5,000+ homeowners
Excellent · 5,000+ reviews on Trustpilot
UK shipping, 30-day returns
Free delivery on Acupanel® and Flutto® panels. 30-day returns on every order.